How To Mine BNQ?
norulljan
Updated at: 2 months ago
How To Mine BNQ?
Welcome to BitNasdaq! Ready to start BNQ Mining? Let’s walk you through the entire process step by step. It’s simpler than you think! Before starting your mining journey, there are two essential steps:
-
First, Sign Up on BitNasdaq.
-
Then, Complete your KYC Verification.
These steps are quick and ensure your account is ready for mining. Once that’s done, here’s what to do next. Open your BitNasdaq app and on the homepage, tap the Mining Center. This is where all the magic happens!
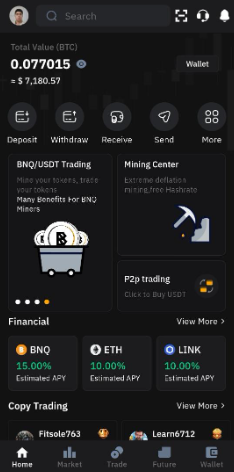
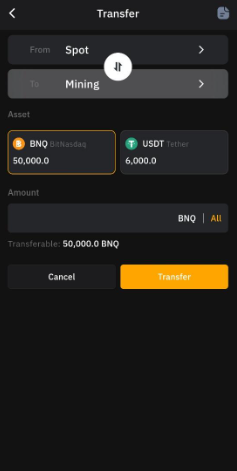
Before getting started, transfer BNQ and USDT to your Mining Account. Tap the arrows in the top right corner of the Mining Center page to do this.
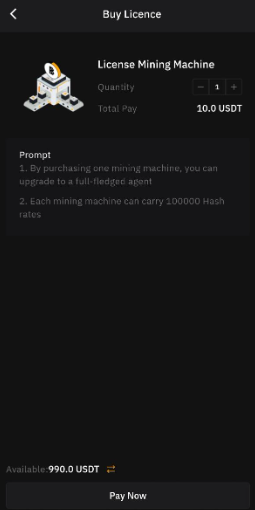
Next, it's time to purchase your Mining Machine.
-
Tap Buy Mining Machine on the Mining page.
-
Select the number of machine you want and tap Pay Now. Confirm your purchase, and you're all set!
Now, head to the Hashrate page.
-
Here, input the number of BNQ you wish to burn to generate Hashrate.
-
Remember, the more BNQ burned, the higher the Hashrate!
-
Once ready, tap Buy Hashrate.
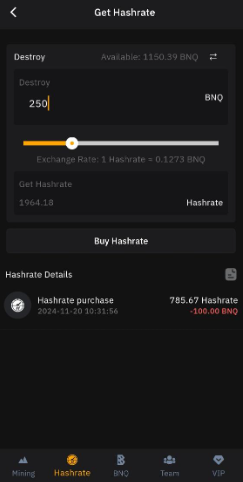
After that, you can check your mining details and collect the BNQ generated from your Hashrate. The more hashrate, the more BNQ you gain.
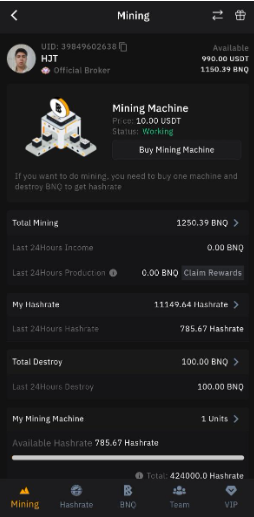
Explore these tabs for more features:
-
The BNQ page shows your Mining Pool and Mining Information.
-
The Mining page lets you claim rewards and track your Hashrate details.
-
On the Teams page, see your invites and commissions.
-
Upgrade your Miner Agent level on the VIP page.
And there you have it! BNQ Mining made simple. Start mining today with BitNasdaq, your pathway to smarter crypto opportunities!