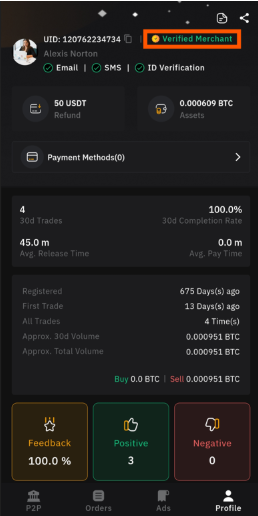
How to become a P2P merchant Via App
好运哥1
Updated at: 2 months ago
How To Become A P2P Merchant Via App
Becoming a P2P merchant on BitNasdaq allows you to post ads and trade easily within the platform. Follow this step-by-step guide to meet the necessary requirements and start trading as a verified merchant.
Step 1: Log In to Your BitNasdaq Account
Open the BitNasdaq app on your mobile device. Enter your registered email or phone number and password to log in. If two-factor authentication (2FA) is enabled, enter the verification code sent to your device.
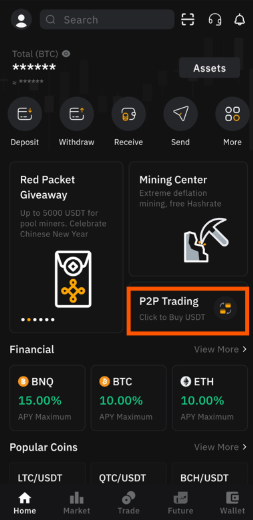
Step 2: Access the P2P Trading Module
Once logged in, navigate to the homepage and tap on ‘P2P Trading.’ This will take you to the peer-to-peer marketplace where you can trade crypto with other users.
Step 3: Go to Your Profile
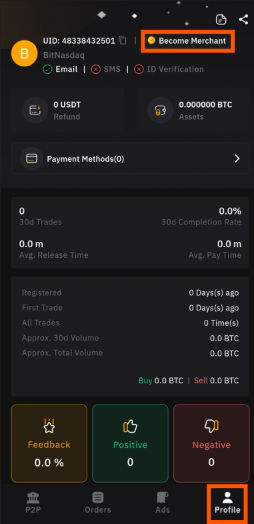
Inside the P2P trading module, locate the ‘Profile’ tab and tap on it. This section contains your trading history, settings, and options related to merchant activities.
Step 4: Start the Merchant Application Process
On the Profile page, tap the ‘Become a Merchant’ button. This will initiate the process of upgrading your account to a P2P merchant status.
Step 5: Complete KYC Verification
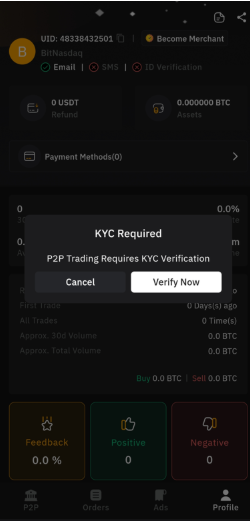
The first requirement to become a merchant is completing Know Your Customer (KYC) verification. This step ensures security and compliance with BitNasdaq’s regulations.
If you haven’t completed KYC, follow the on-screen instructions to submit the necessary identity documents.
Once verified, return to the ‘Become a Merchant’ section.
Step 6: Freeze 50 USDT in Your P2P Account
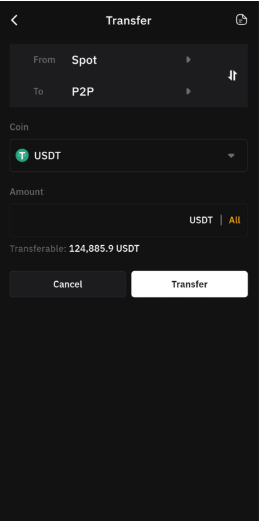
To secure your merchant account, BitNasdaq requires you to freeze 50 USDT in your P2P wallet.
If you already have the required funds in your P2P account, the system will automatically freeze them.
If your P2P wallet balance is insufficient, transfer the necessary amount from your main wallet before proceeding.
Step 7: Meet the Merchant Requirements
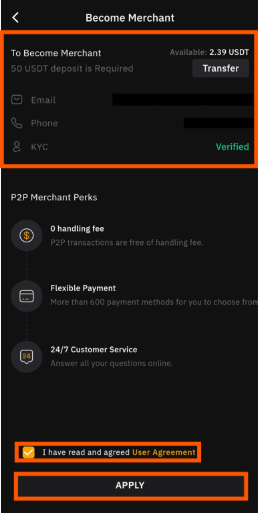
Both KYC verification and the USDT freeze are mandatory to become a merchant. Ensure that you have met these criteria before proceeding.
Step 8: Accept the User Agreement
Carefully read through the BitNasdaq Merchant User Agreement. Once you understand and agree to the terms, checkmark the agreement box and tap ‘Apply’ to finalize your application.
Conclusion
Congratulations! You are now a verified P2P merchant on BitNasdaq. You can start posting your first P2P trade ad and begin trading securely within the marketplace. Happy trading!
